START Mining KASPA to your Own Home Solo Pool!

Welcome, crypto miners! In this in-depth guide, we’re taking a hands-on approach to setting up your very own Kaspa solo mining pool at home. Sounds complicated? Trust me, it’s easier—and cheaper—than you might think. We’ll walk through everything from grabbing hardware straight off Amazon to flashing Umbrel OS, syncing the blockchain, and linking your miner to your personal Kaspa pool. If you’ve ever dreamed of cutting out pool fees, reducing mining latency, and taking solo control of your mining rewards, keep reading—you’re in the right place!
For more on this topic, check out this detailed video: START Mining KASPA to your Own Home Solo Pool!
Table of Contents
- Why Run a Home Kaspa Node and Pool?
- What Hardware Do You Need?
- Shopping List and Cost Breakdown
- Setting Up: Step-by-Step Hardware Assembly
- Installing Umbrel OS on Your Node
- BIOS Tweaks for Seamless Operation
- First Boot and Umbrel OS Setup
- Deploying the Kaspa Node and Pool App
- Syncing the Blockchain: What to Expect
- Connecting Your Miner to Your Home Pool
- Monitoring Progress & What to Do with Errors
- Results & Next Steps: Is Solo Mining Worth It?
- Bonus: Moving Your Node for Best Latency
- Useful Links & Shout Outs
- Final Thoughts
Why Run a Home Kaspa Node and Pool?
Let’s be honest: most miners stick with big pools—it’s easy, convenient, and doesn’t require much setup. But what if you could keep every bit of your reward and ditch those pool fees? Setting up a solo node at home gives you full control. Plus, when your miner and node are on the same local network, you cut out network delays (latency), which could give you an edge in finding blocks.
“Latency is super important when hitting blocks. If you can put a node on the exact same network as your Kaspa miner, it definitely increases your chances, boosts performance, and avoids problems when hitting solo blocks.” – The Hobbyist Miner
Why Solo Mine?
- No more pool fees: Every block reward goes to you.
- Lower latency: Locally hosted node can respond faster than public nodes—which is a real boost if you’re running serious hashpower.
- Privacy and control: Keep your mining activity private and avoid depending on third parties.
What Hardware Do You Need?
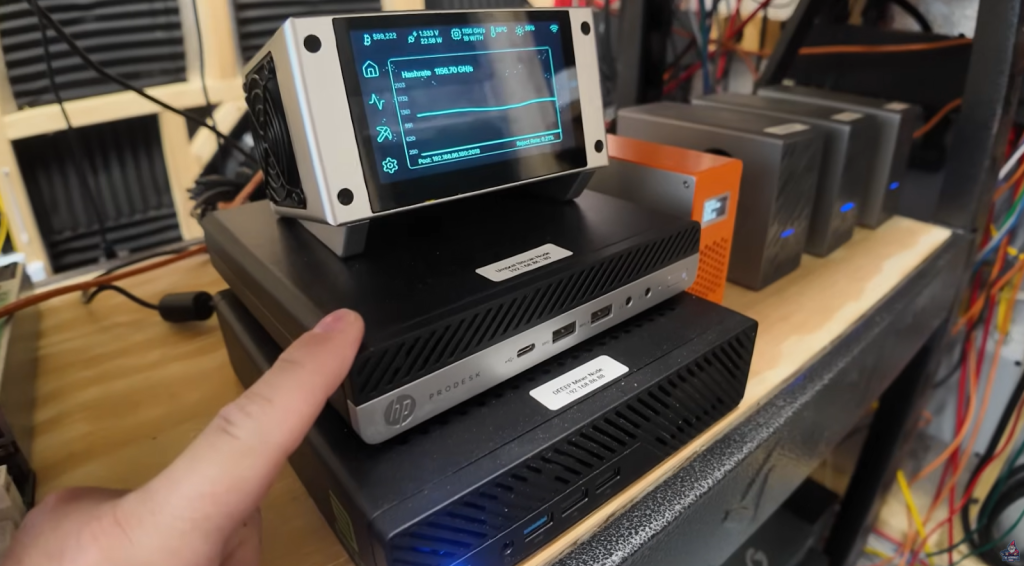
You might think this needs a high-end server rack or pricey workstation. Nope! This guide uses a solid but simple refurbished PC from Amazon:
Minimum Requirements:
- CPU: Intel i3 or i5 (i5 preferred, but you can get by with i3)
- Memory: 8 GB recommended (16 GB is even better)
- Storage: 1 TB NVMe (2 TB preferred, to be future-proof)
- Ethernet: Wired networking (WiFi is possible but not ideal)
- Small USB Flash Drive: At least 8 GB to flash Umbrel OS
Example Setup:
- HP Prodesk 600 G3 (used for both Bitcoin and Kaspa solo nodes)
- 16 GB DDR4 RAM
- 2 TB NVMe SSD
“You don’t need anything crazy. In fact, I did this with a refurbished PC off Amazon and a solid, budget-friendly NVMe drive.” – The Hobbyist Miner
Setting Up: Step-by-Step Hardware Assembly
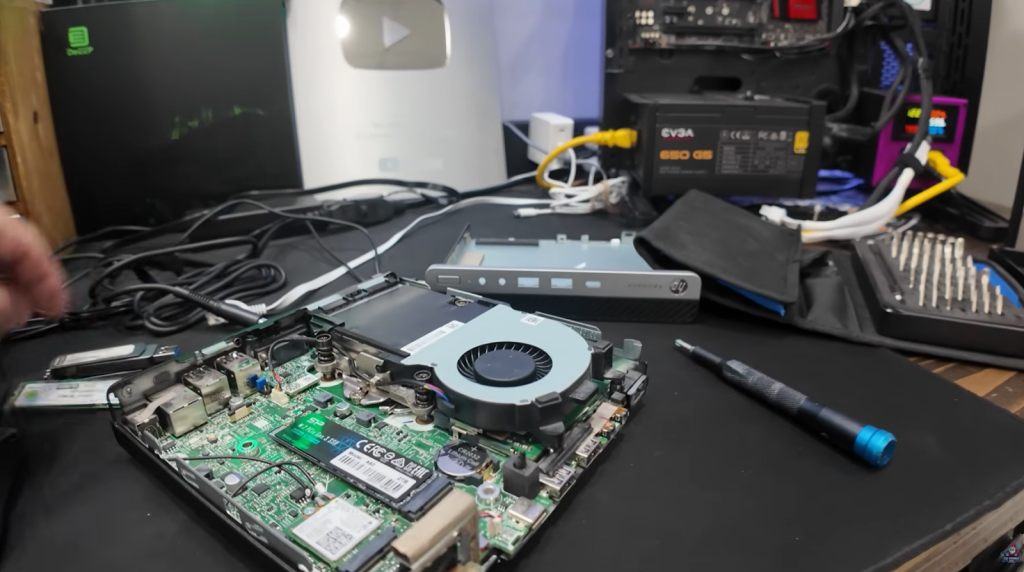
Let’s jump in! You don’t need to be a hardware wizard.
- Open the case: Just pop off the cover (HP and Dell desktops are usually tool-less or need a single screw).
- Swap the NVMe drive: Unscrew and remove the old drive, slide in your new NVMe, and secure.
- Install additional RAM (optional): If you want more than 8 GB and have the sticks lying around, pop them in.
- Prepare a spare USB stick: You’ll need this for Umbrel OS install.
Installing Umbrel OS on Your Node

Umbrel OS is super user-friendly and a solid pick if you’re not a Linux pro. It gives you a clean GUI for node management and works straight out of the box for most hardware.
Flashing Umbrel OS
You’ll need two things:
- Umbrel OS image
- Balena Etcher (to write the image to USB)
Here’s the step-by-step:
- Download the Umbrel OS image from Umbrel’s website
- Install Balena Etcher on your current PC.
- Use Etcher to write the Umbrel OS image to your spare USB stick.
- Once flashing is finished, eject the USB.
For a Step by Step Guide, check out this detailed video: START Mining KASPA to your Own Home Solo Pool!
BIOS Tweaks for Seamless Operation
Before you boot Umbrel OS, let’s optimize your BIOS for crypto mining use:
- Fast Boot: Leave enabled (boots faster).
- CD ROM Boot: Disable (you’re not using DVD/CDs).
- USB Boot: Enable (must be ON to boot Umbrel OS installer).
- PXE Boot: Disable (network PXE isn’t needed).
- After Power Loss: Set to “Power On”—so your node auto-restarts if power flickers.
- Secure Boot: Disable.
- Legacy Boot/Support: Enable (lets you run Umbrel on older hardware).
“Always recommend you do AC power on, which is nice… If your power goes out and everything comes back, your node comes back as well. Super convenient.” – The Hobbyist Miner
First Boot and Umbrel OS Setup
- Insert your just-flashed Umbrel OS USB stick into your mining PC.
- Boot up—should start right into the Umbrel installer.
- The Umbrel install screen will ask which drive to install on.
- Be careful: Don’t pick your USB stick—select your big NVMe drive!
- Hit Enter, and Umbrel will wipe the drive and install. This takes about 5 minutes.
“After install, it says ‘Press any key to shut down. Remember to remove the USB drive before turning back on.’ Follow that!” – The Hobbyist Miner
- Remove USB, reboot, and let Umbrel OS come up.
- Visit the node’s web interface on your local network (find the assigned IP or use umbrel.local) from a different computer or laptop.
- Create your admin account for the node.
- Write down your credentials somewhere safe!
Deploying the Kaspa Node and Pool App
Now for the fun part: Installing your Kaspa node and pool!
If you get stuck or become confused, check out this detailed video: START Mining KASPA to your Own Home Solo Pool!
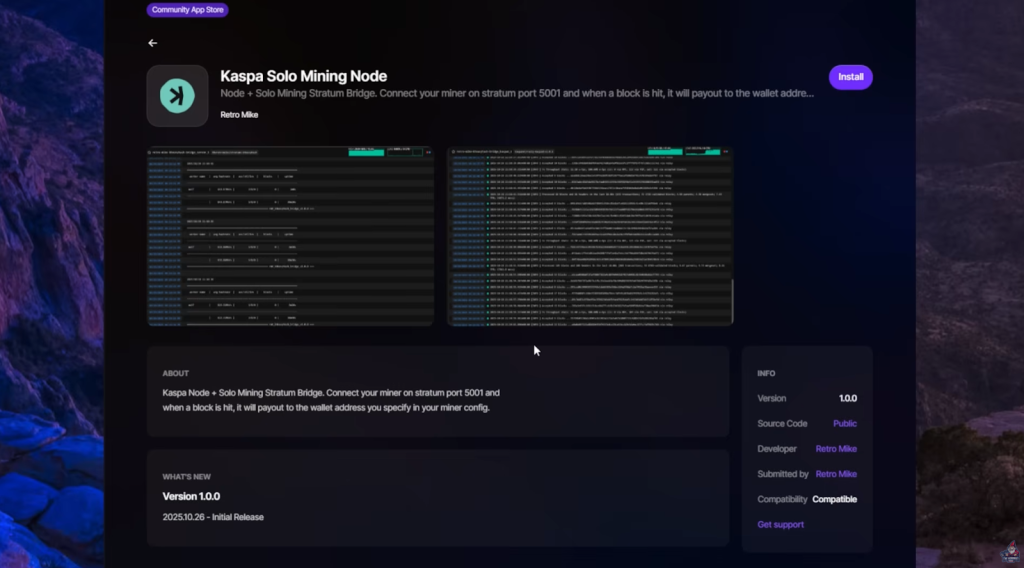
Why Not Use the Built-In App Store?
Umbrel’s default App Store has Bitcoin and Lightning nodes, but no Kaspa support yet. Luckily, the Kaspa community came through.
Shoutout to Retro Mike for building a combined Kaspa Node + Solo Pool package just for Umbrel. We’ll add his Community App Store to install everything in one go.
Steps:
- On the Umbrel OS homepage, click the “…” (more) menu.
- Select Community App Store.
- Paste in Retro Mike’s special GitHub repository
- Click Add, then Open.
- You’ll see “Kaspa Solo Mining Node” pop up—select it!
- Click Install. This will deploy both the Kaspa node and the stratum pool bridge (what your miner connects to).
- Once installed, you’ll see your shiny new Kaspa app in the dashboard. Click to open.

Syncing the Blockchain: What to Expect
The first sync is the “hurry up and wait” part of node setup. Kaspa’s blockchain isn’t massive, but syncing from scratch can take a day or more depending on your connection/package.
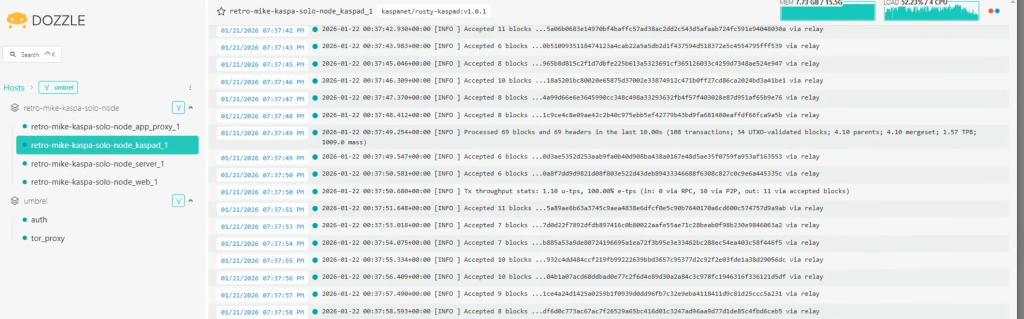
- Node Status: On the left, look for “KasPad”—this is your actual node.
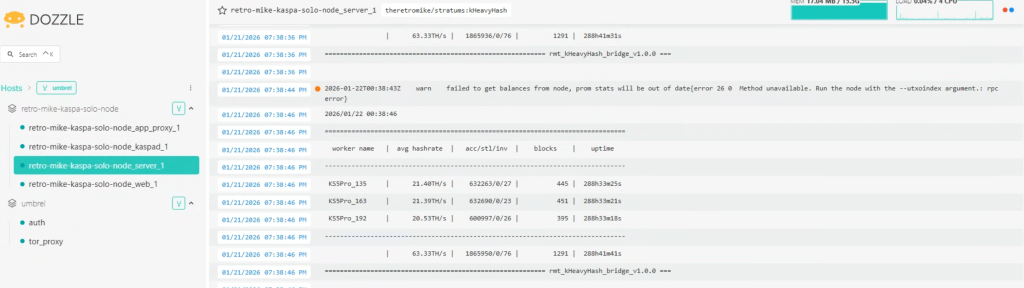
- Pool Status: On the left, look for “Server” is your mining pool bridge. It’ll show errors until your node is fully synced (e.g., “Node is not synced, waiting for sync”).
“Don’t panic about all the logs! It’s just doing its thing. Wait for sync to complete—leave it running as long as needed.” – The Hobbyist Miner - If you reboot, Umbrel will pick up where it left off.
Connecting Your Miner to Your Home Pool
Once your node status changes to “synced,” you’re now ready to point your Kaspa ASIC or GPU miner at your own local pool!
What’s My Pool URL?
Check the stratum bridge info—it should look like:
stratum+tcp://[your-node-ip]:5001
Example:
stratum+tcp://192.168.1.75:5001
- Use your miner’s Web UI or config tool.
- Input your public Kaspa address where required.
- Set pool IP to your local node’s IP and the port to 5001.
Now on your Kaspa Miner, configure your Stratum/Pool to be
stratum+tcp://[your-node-ip]:5001
(Ofcourse making sure you remove [your-node-ip] and replacing with the nodes actual IP/Umbrel IP).
For Miner, use your “KaspaAddress.WorkerID”
For Password, use something like “X”
Monitoring Progress & What to Do with Errors
You can check mining status using both the Umbrel web UI and your miner’s dashboard.
What should you see?
- Synced: Node is up and ready.
- Pool Status: Shows some “Client connected” log entries.
- Kaspa Explorer: Track blocks earned by dropping your Kaspa address in.
“A heads up, there is pretty web interface or dashboard for this just yet, this setup is the basics and “bones” to get by”. – The Hobbyist Miner
Common Hiccups
- Miner Hashrate Way Too Low: If your miner is old or acting up check the device firmware, try resetting, or consider retiring the hardware.
- “Node is not synced” Error: Just wait—syncing may take up to 48 hours.
- Occasional Red Arrows or Log Messages: Especially with IceRiver firmware, sometimes messages just mean the miner is looking for optional features. It’s not a deal-breaker.
Results & Next Steps: Is Solo Mining Worth It?
So, what did we learn after 24 hours?
- Node and pool were up, synced, and solo mining was live.
- Even with a semi-broken miner, the system accepted shares.
- Main miner had low hashrate due to hardware issues, but the setup still worked.
How to Know If You Hit a Block
Use the Kaspa Explorer:
- Paste your public address in the search bar.
- View block rewards credited—each block will show as a payment.
Final Thoughts
If you’ve made it this far, congrats: you’re ready to skip the big public mining pools, cut your fees to zero, and control your own mining destiny from the comfort of your garage, shed, basement, or home office. Setting up a home Kaspa node and solo pool really is accessible—you just need a few parts and some patience.
And remember, mining is as much about the journey as the reward. Best of luck finding those solo blocks—may your share submissions be fast and your rewards plenty!
See You Next Time!
Got questions? Join The Hobbyist Miner Community Discord for great fellow crypto miner conversation, community help and more! Join entirely free here!