






How to Earn Bitcoin with your Apple MAC!
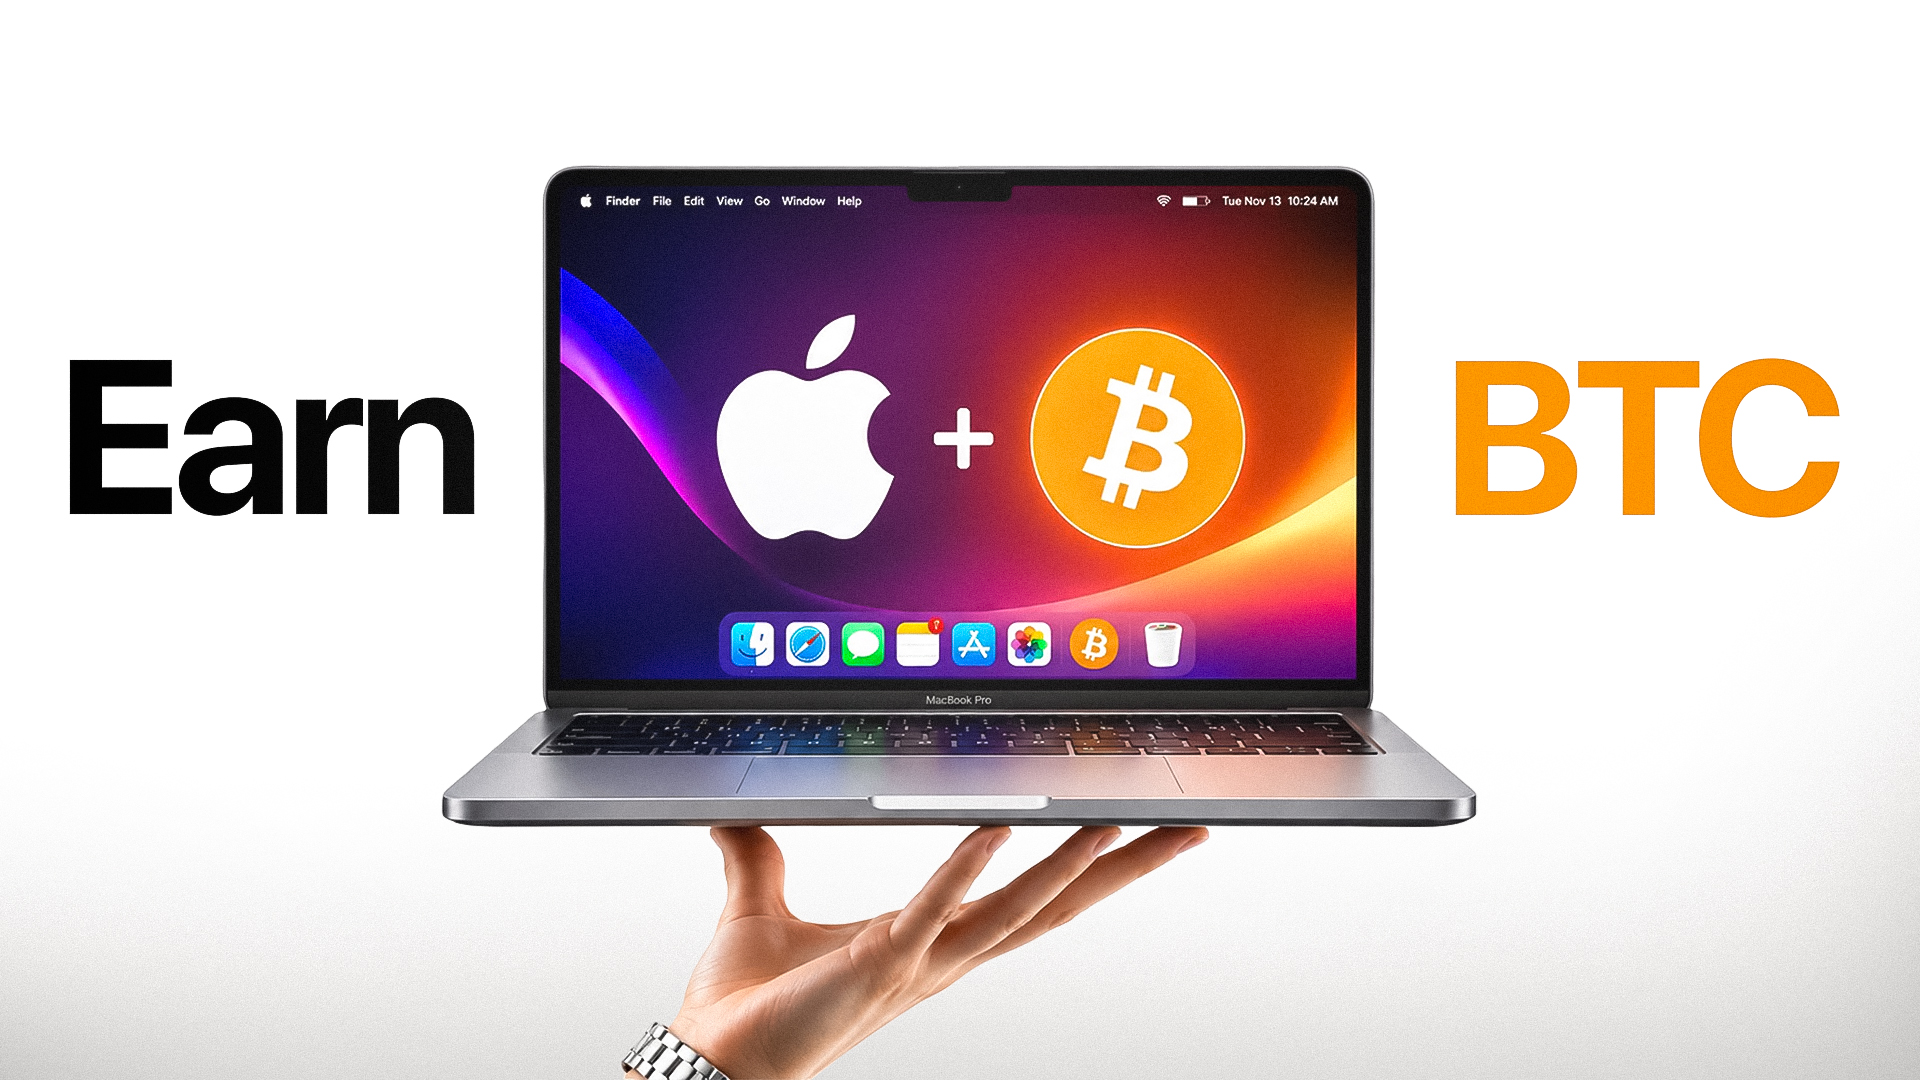
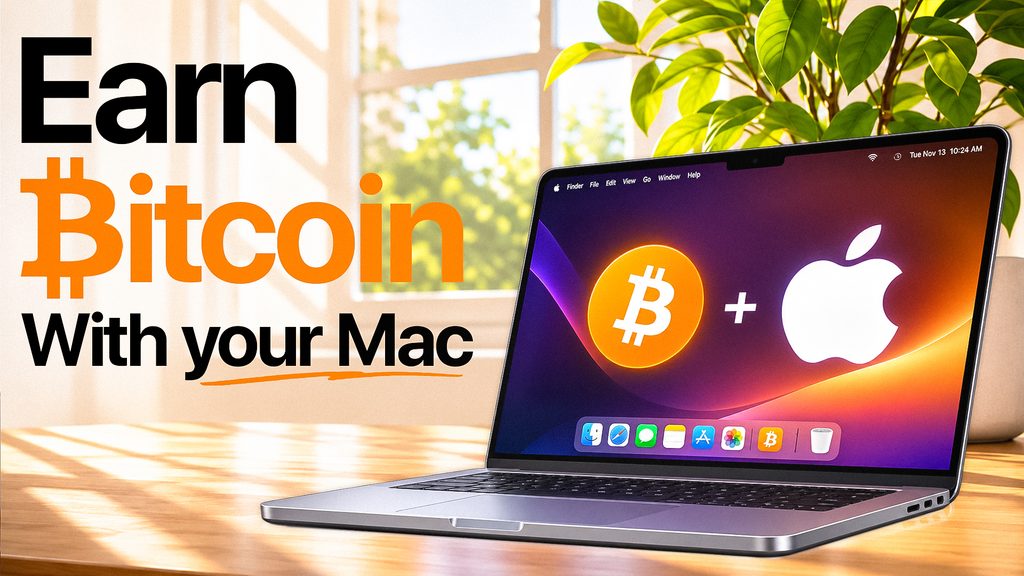
Did you know you can earn Bitcoin using your Apple MacBook, MacBook Air, MacBook Pro, iMac, or Mac Mini? Whether you’re running an older Intel-based Mac or one of Apple’s newer M1, M2, M3, M4, or M5 processors, you can put your computer’s CPU to work earning cryptocurrency! By using free mining software called XMRig alongside the mining platform unMineable, you can participate in cryptocurrency mining and receive rewards directly in Bitcoin (BTC). While your Mac isn’t actually mining Bitcoin itself, it’s using the RandomX algorithm to mine Monero (XMR), which unMineable automatically converts into Bitcoin rewards. It’s a great opportunity for beginners, home miners, and cryptocurrency enthusiasts to experiment with mining without purchasing dedicated ASIC mining hardware.
In this step-by-step guide, I’ll walk you through how to set up Bitcoin mining rewards on your Apple Mac from start to finish. We’ll cover downloading the correct version of XMRig for your processor, configuring your config file, connecting to unMineable, setting up your Bitcoin wallet for payouts, and allowing XMRig through macOS security settings. I’ll also show you how to launch your miner, monitor your CPU utilization using Apple’s Activity Monitor, and track your mining hashrate and earnings. Just remember that CPU mining on a Mac isn’t going to make you rich overnight, and electricity costs, hardware performance, and mining difficulty all play a role in profitability. However, it’s a fun, educational way to turn your Apple Mac into a cryptocurrency miner and start accumulating small amounts of Bitcoin!
Checkout this Step by Step Video for More Help
Before we Start, you need a bitcoin wallet!
Before we start earning Bitcoin with our Apple Mac, there’s one important thing we need to take care of first: setting up a secure Bitcoin wallet to receive and protect our mining rewards! As home crypto miners, we spend a lot of time worrying about hashrates, power consumption, electricity costs, and profitability, but protecting the cryptocurrency we earn is just as important. That’s why I’ve personally been using and recommending the Tangem Hardware Wallet for several years. Unlike leaving your cryptocurrency sitting on an exchange, Tangem is a cold storage hardware wallet that puts control of your private keys directly in your hands. One of my favorite things about Tangem is its simplicity. Instead of dealing with complicated hardware, cables, or additional devices, Tangem uses a physical card about the size of a credit card that connects to your smartphone using NFC technology. It supports Bitcoin, Dogecoin, Litecoin, Ethereum, and thousands of other crypto assets across supported networks, making it an excellent option for home miners who earn multiple cryptocurrencies. Remember, not your keys, not your crypto!
If you’re brand new to cryptocurrency wallets, don’t worry! I’ve put together several resources to help you get started with Tangem before we begin mining Bitcoin on our Mac. I highly recommend watching my video, Beginners Step-by-Step Guide to Setting Up a Tangem Crypto Wallet, where I walk through the setup process, configuring your wallet, and sending and receiving cryptocurrency. You can also read my more detailed article, Is Tangem the Best Crypto Wallet? Why Every Home Crypto Miner Needs Cold Storage!, where I explain why cold storage matters, Tangem’s security features, backup options, and even how you can swap supported cryptocurrencies directly through the Tangem app. If you don’t already own a Tangem Wallet, you can purchase one through my Tangem link here. I recommend getting a set with backup cards and keeping those backups in separate, secure locations. Once your wallet is set up, simply copy your Bitcoin (BTC) receiving address on the Bitcoin network, because we’ll need it in the next steps when configuring unMineable to receive our mining rewards!
Step 1: Setup your Account
Go to the wesbite Unmineable and Create an Account by clicking Sign In, in the upper right hand corner.
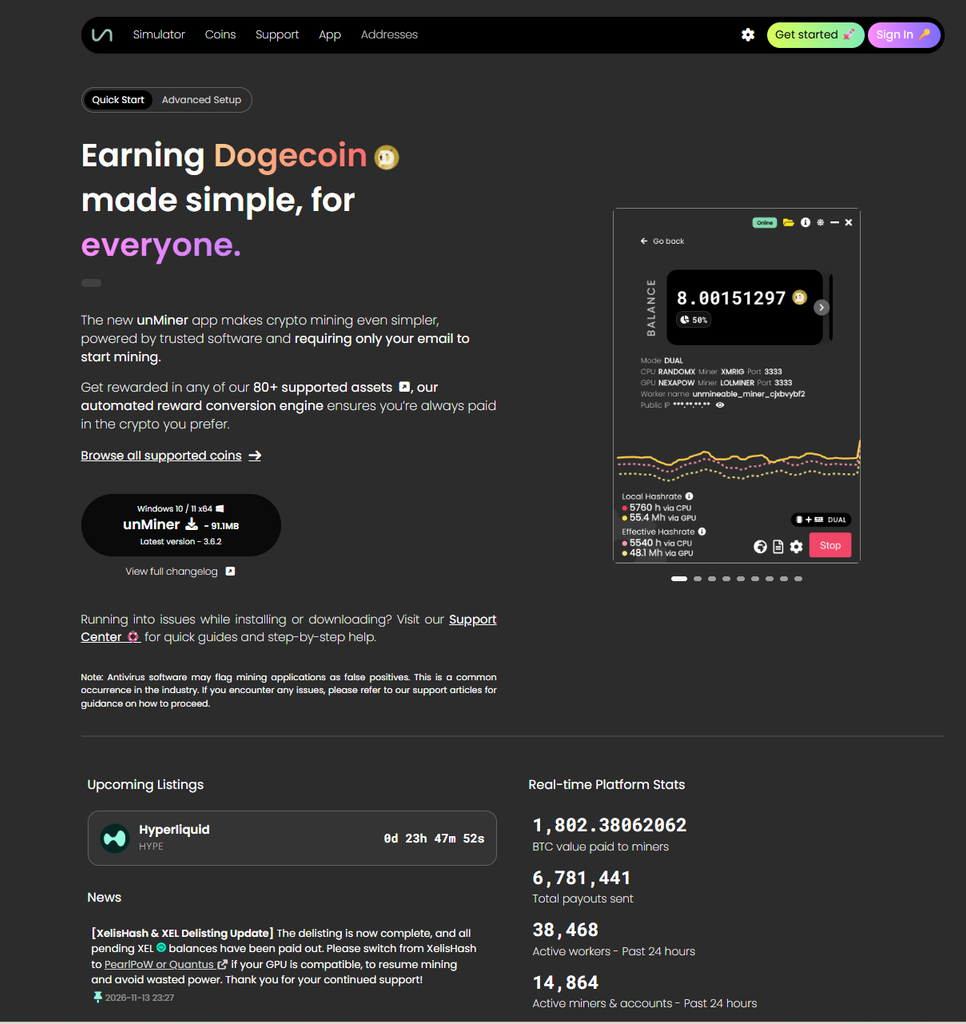
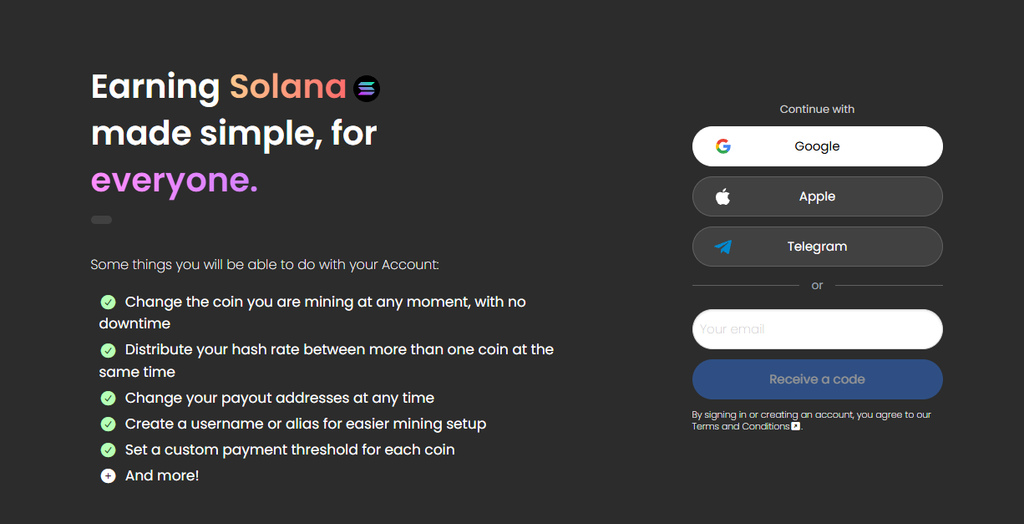
Feel free to make the sign-up process easy by setting up your account with your Gmail Account.
Once logged in, click the Balance option in the middle. In the Bitcoin section click the Update your Withdrawl Settings button.
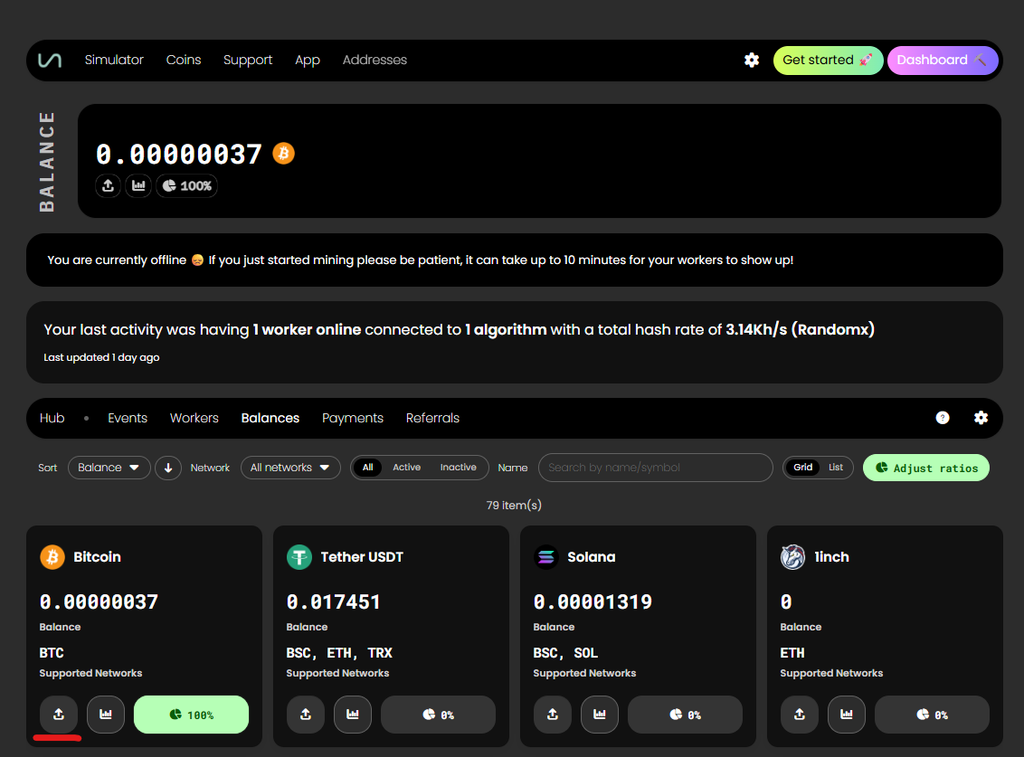
Click the Withdrawl Address drop down and click Add Address. Enter in your Bitcoin Wallet address and an Alias for it, then click Add

Step 2: Download the XMRig Files
Click Coins at the top of the Unmineable Page
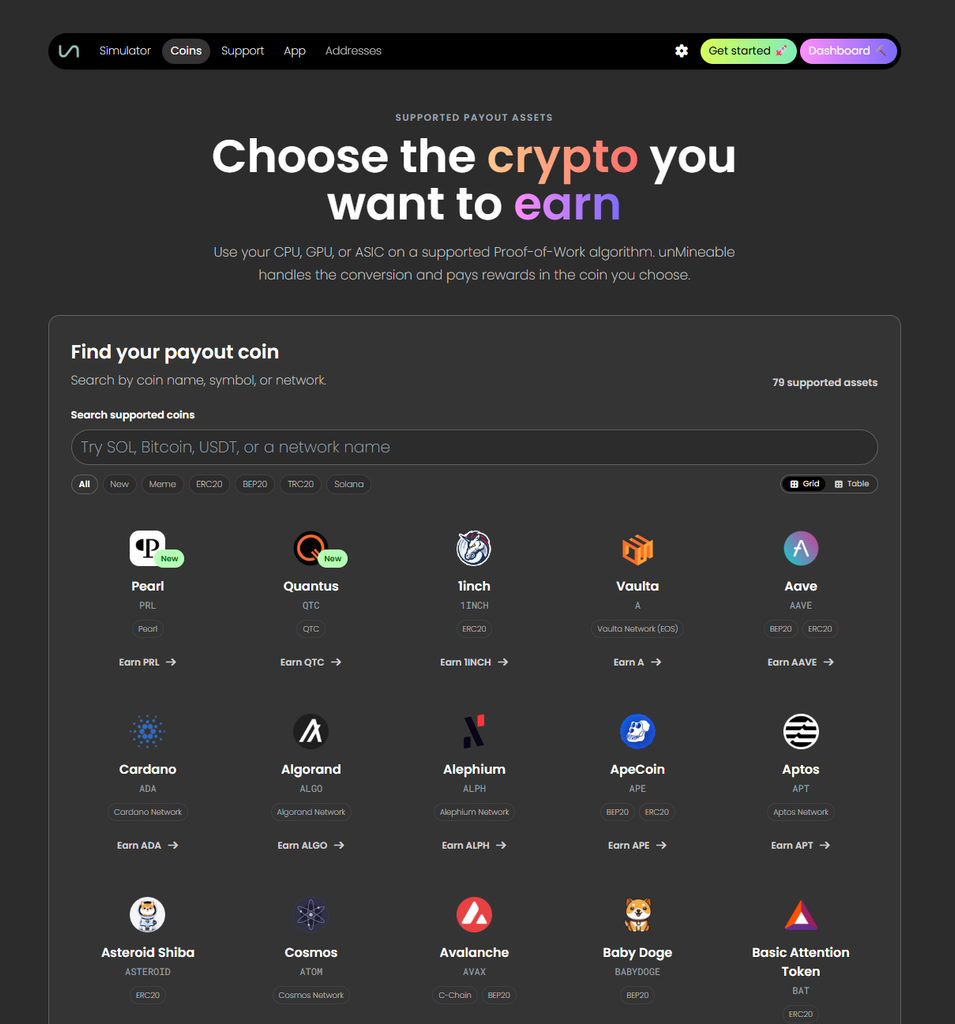
Scroll down and click on Bitcoin
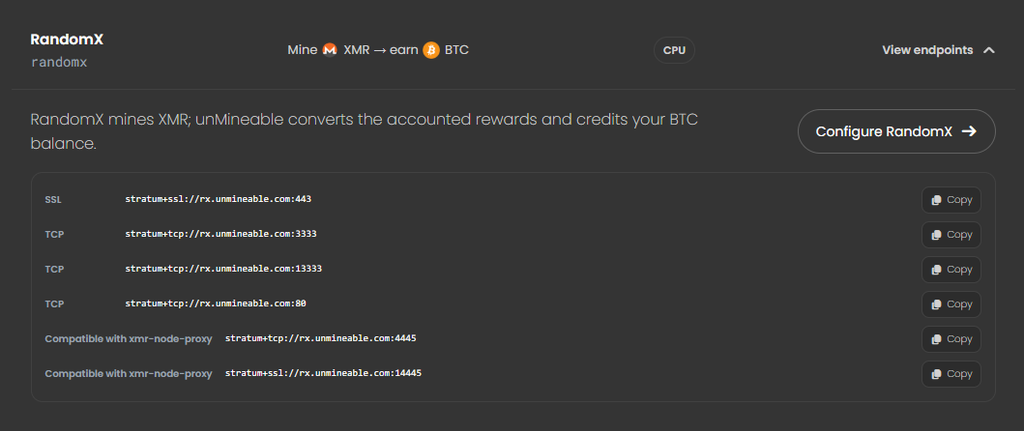
Scroll down and click on RandomX
On the right ahdn side click on Configure RandomX
Scroll down to the Connect your RandomX Miner
Take note of the Account Name listed in the middle, mine says TheHobbyistMiner. You will need this in upcoming steps.
At the bottom click on Download miner files
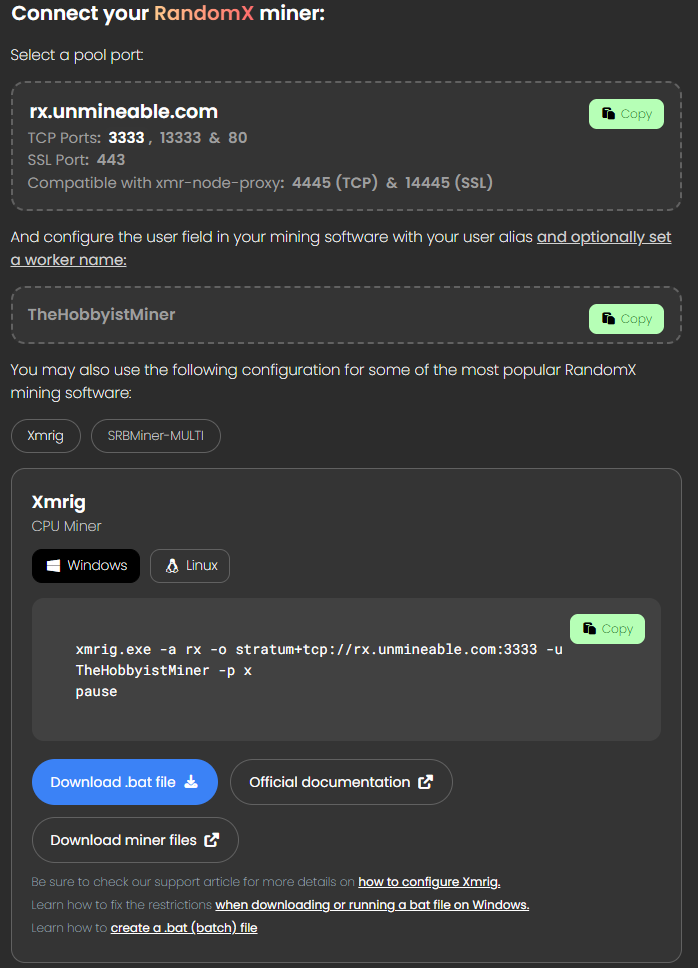
You will now be redirected to the XMRIG Github Website.
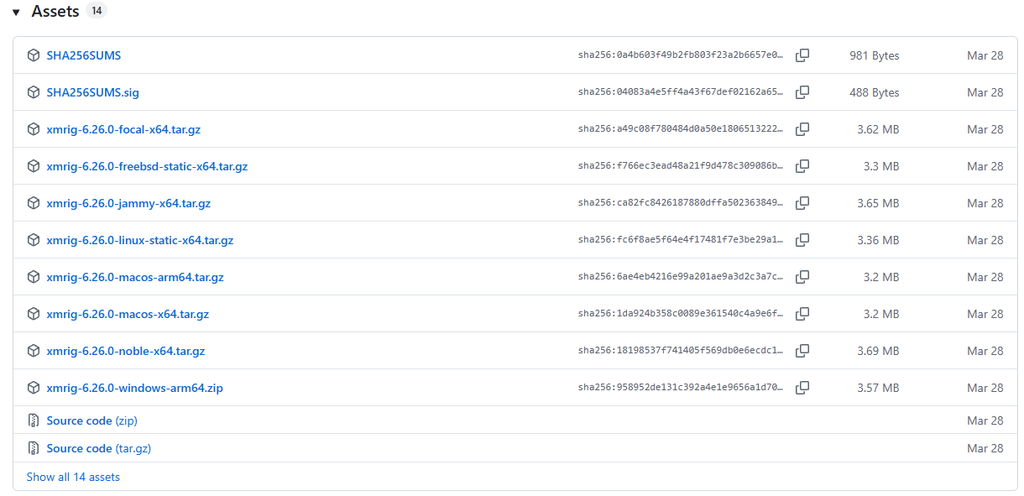
Scroll down to the Assets section.
Before proceeding confirm which MAC CPU Processor your running
Click the Apple Logo in the upper-left corner of your screen.
Click About This Mac
Look for Chip or Processor
Find your Mac Processor and the proper associated file to download.
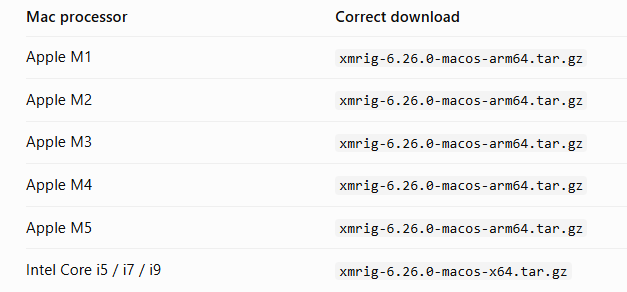
Go back to the Assets section of the XMRig Github Website and single click on the matching file to your Mac Processor to download the file.
Step 3: Configuration and setup
Open Finder and go to Downloads
Double Click on the file you Downloaded
It will generate an XMRIG Folder
Expand the XMRig Folder and Right Click Config.JSON and go to Open With and select Text Editor
Scroll down to the Pools Section
Replace the following lines with the ones below. This has to match perfectly.
“algo”: “rx/0”,
“coin”: “monero”,
“url”: “rx.unmineable.com:3333”,
“user”: “TheHobbyistMiner.MacBookAir#HOBBYIST”,
“pass”: “x”,
Note, on the user line, remove TheHobbyistMiner and put in your account name mentioned previously.
Instead of MacBookAir replace with the name of your machine, you can name it anything.
Finally putting #HOBBYIST at the end gives you a discount on mining fees from 1% down to 0.75% when using the Unmineable platform.
Close the Config.JSON File
Step 4: Launching XMRIG
Go back to Finder, Click Go at the top, click Downloads and Open the XMRIG Folder
Double Click on the XMRIG File
If you get this messsage, it is totally normal and expected, do not be alarmed
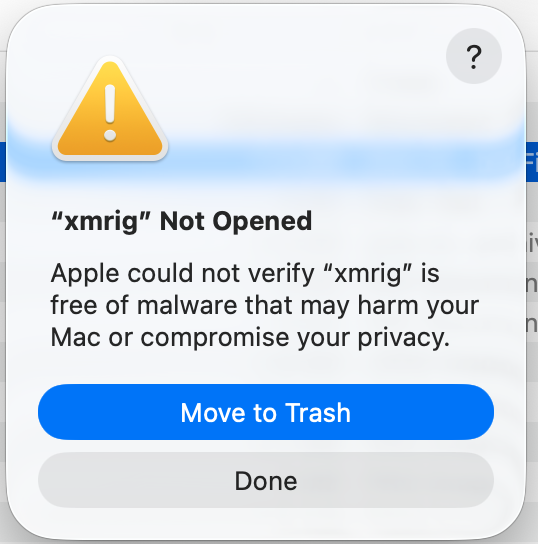
Click Done
Go to the Apple top Left of your screen. Go to System Settings, Click on Privacy and Security
Under Security you will see XMRIG was Blocked to Protect your MAC
Click Open Anyways
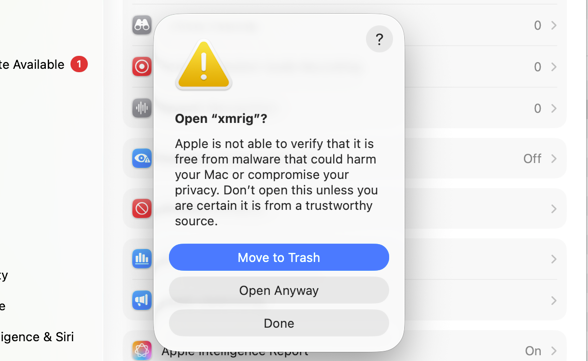
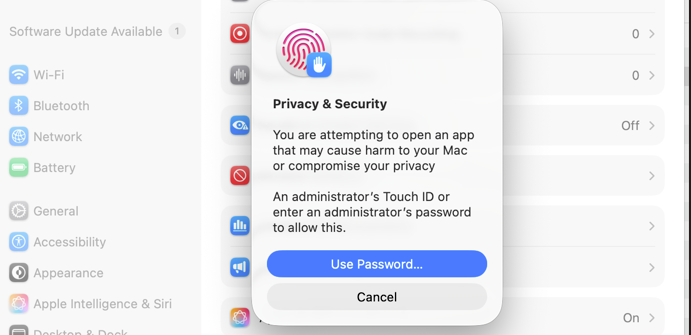
You maybe prompted to log in as the administrator, all based on your Mac’s settings. Click Use Password if prompted and Sign In.
Step 5: Time to Start Mining
Go back to Finder, Click Go at the top, click Downloads and Open the XMRIG Folder
Double Click on the XMRIG File
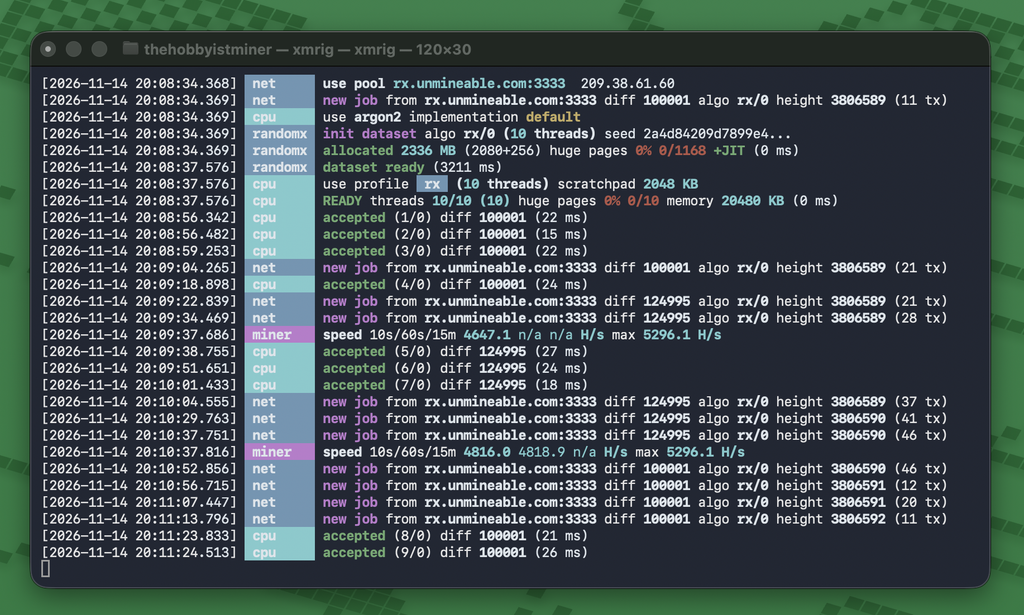
Your now Mining Monero with your Mac’s CPU Processor. But we have a few things to configure before we are done.
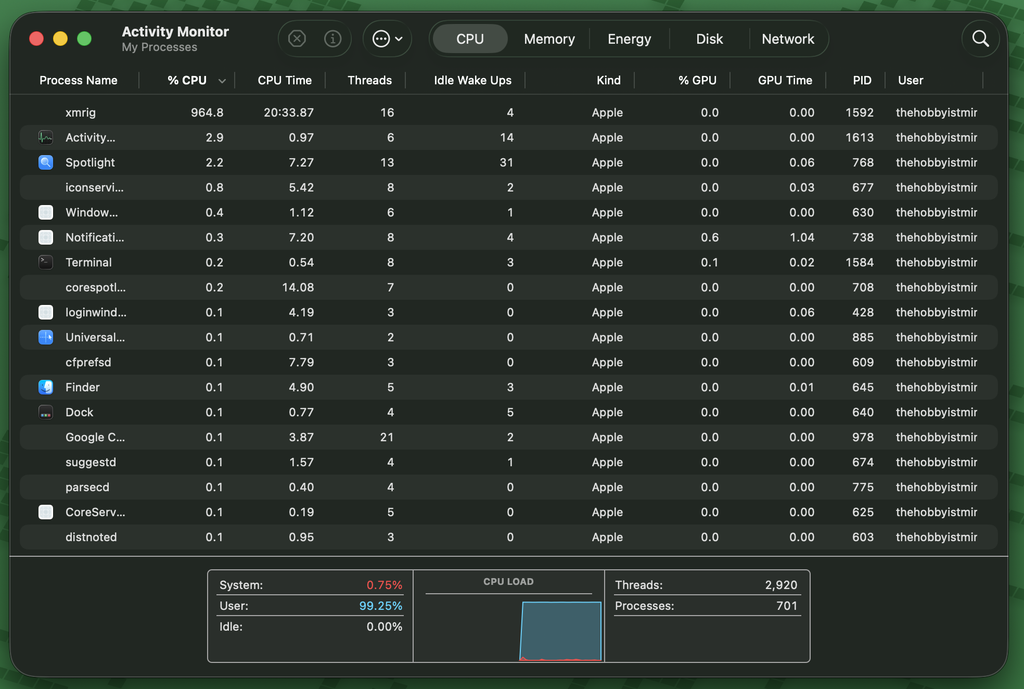
Go to Apps and Activity Monitor
Note: You will notice at the bottom that your CPU load is maxxed out. I would not recommend using your computer will XMRIG is running. It will perform slow and lock-up if you try to do too many tasks and functions.
Step 6: Get Paid in Bitcoin
Go back to the Unmineable Website
Click Dashboard top right
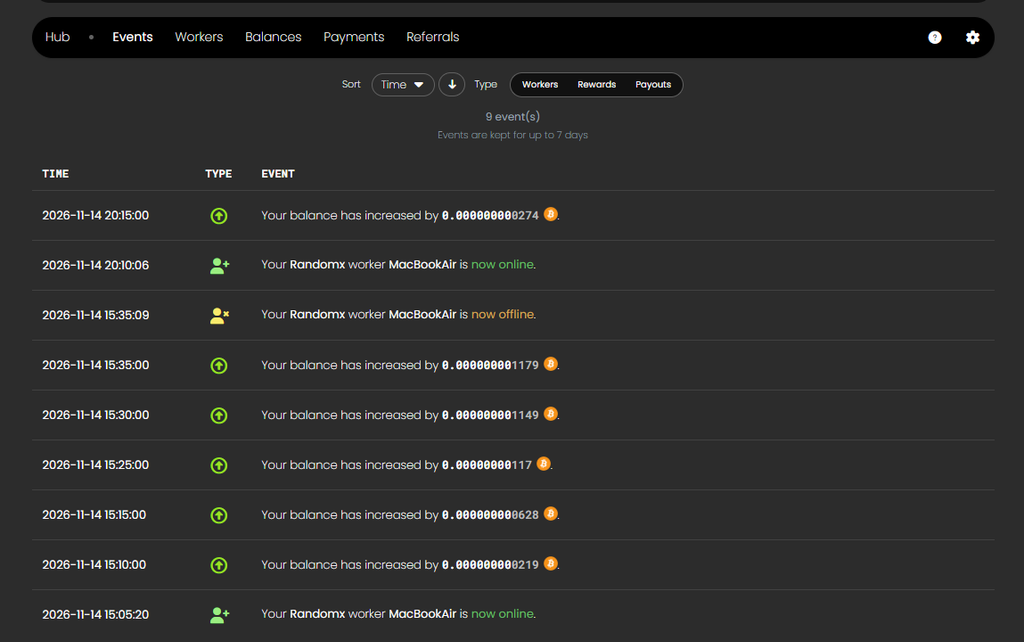
You will now see your miner has come online and payouts accumulating
Click the Workers tab
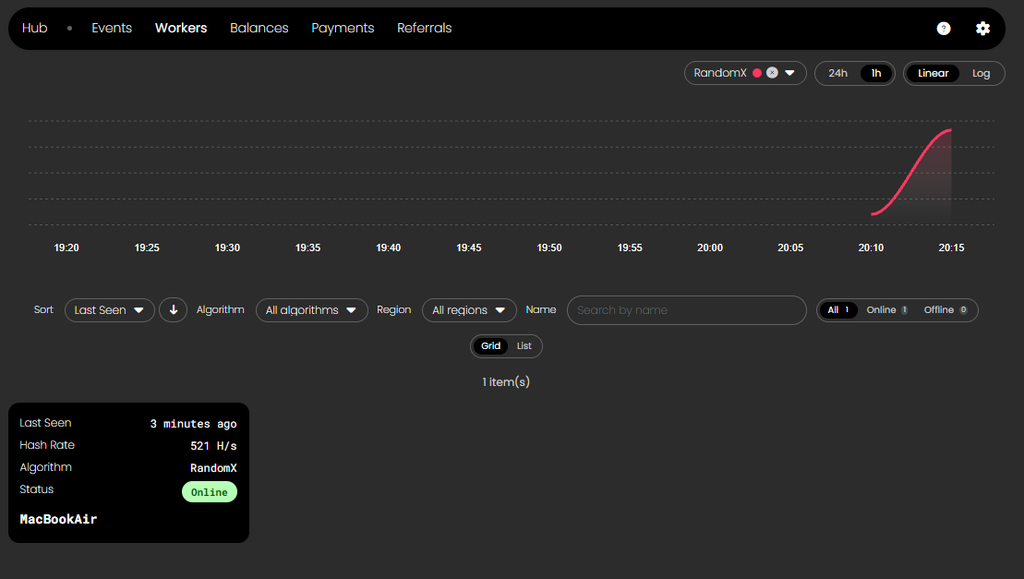
You will notice the graph’s hashrate red line is starting to climb upward on the right side
Down below you will notice each machine you setup has its own black box with individual details
Go to Balances
Click on the Green Button that says 100%, yours maybe gray and say 0%
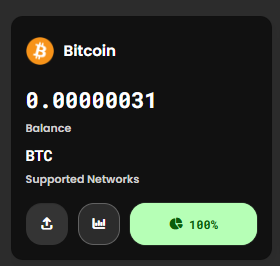
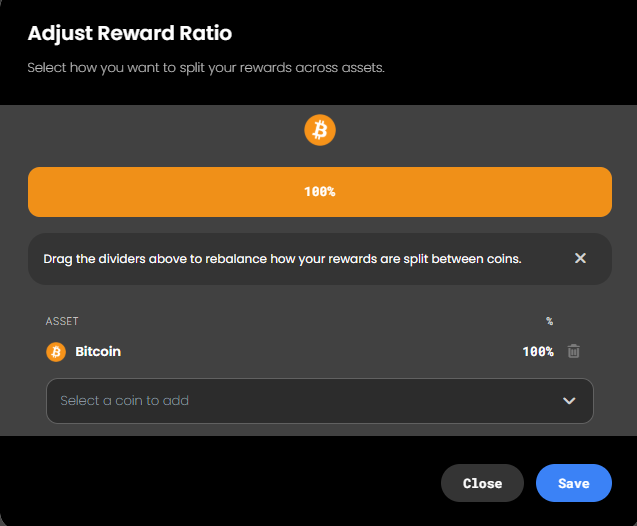
If you’d like to get paid out in 100% Bitcoin, leave this as is at 100%. If you would like to add other coins, this area lets you adjust your payout distribution.
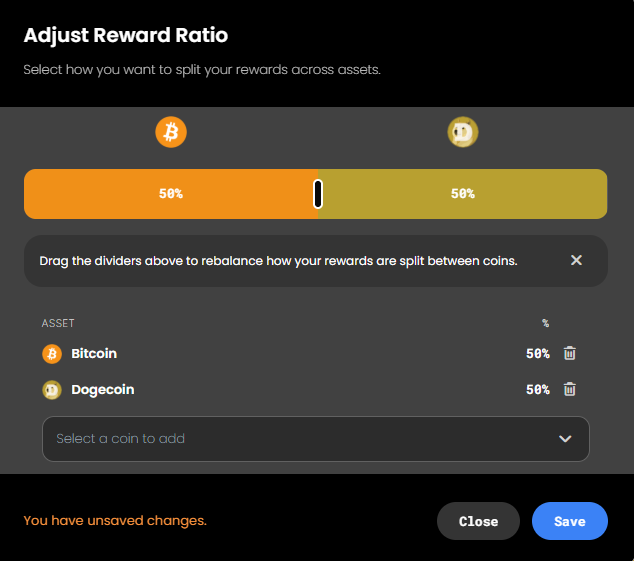
You could add Dogecoin and setup payouts to be 50% Bitcoin and 50% Dogecoin. However make sure you add your Dogecoin address as well, just like we did with Bitcoin back in Step 1.
Your balance will increase slowly using a Computer or MAC to earn Bitcoin
The Event page is a good spot to keep track of what is happening on your account
Under Payments you can see when payouts from Unmineable are sent to your Bitcoin Wallet address
To Stop Mining, Just Close the XMRIG Screen
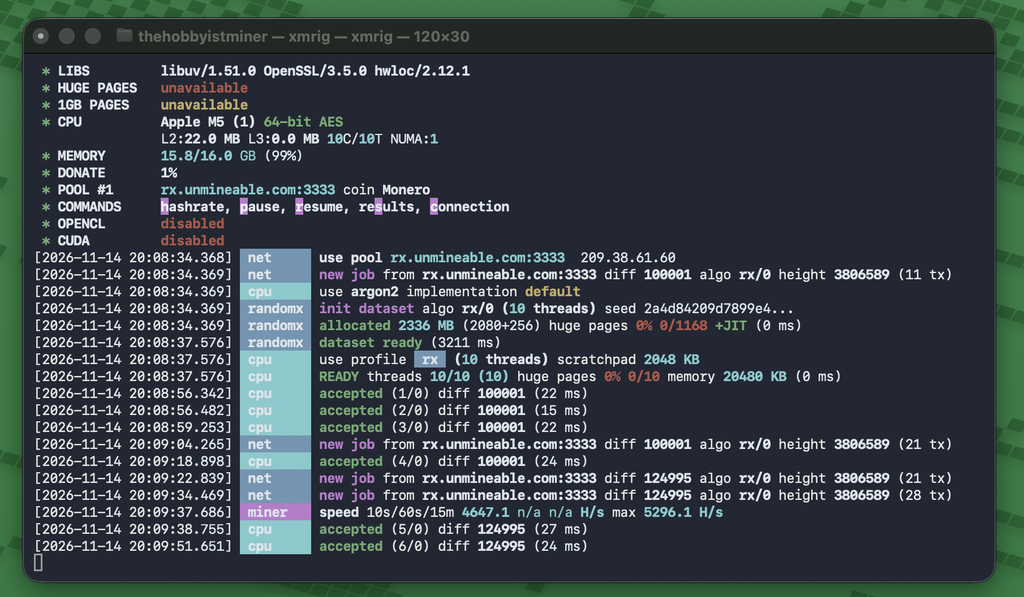
Start small, learn the basics and grow!
Mining cryptocurrency with your computer, whether it’s a Windows PC, Apple MacBook, or Mac Mini, is one of the best ways to get your feet wet and learn the fundamentals of crypto mining! It’s an opportunity to get hands-on experience without spending hundreds or thousands of dollars on dedicated mining hardware. You’ll learn how mining software works, how to connect to mining pools, configure wallets, monitor your hashrate, understand mining difficulty, and ultimately receive your first cryptocurrency rewards. However, it’s important to set realistic expectations. Bitcoin’s network hashrate and mining difficulty have grown tremendously over the years, making Bitcoin mining an extremely competitive industry. Even dedicated Bitcoin ASIC miners that cost thousands of dollars may only generate around $10 per day in gross revenue, depending on the hardware and current market conditions, before factoring in electricity costs. Your everyday computer simply cannot compete directly with these specialized machines. And while we’re using unMineable to mine Monero and receive Bitcoin rewards, the amount you’ll earn using a CPU will still be relatively small.
But here’s the thing: getting started with crypto mining isn’t always about making money. Sometimes it’s about learning! You don’t need to go out and purchase an expensive ASIC miner, build a GPU mining rig, or invest thousands of dollars to begin your journey. Start with the computer you already own, experiment with different configurations, monitor your results, and learn how everything works. The knowledge and experience you gain today will help you make better decisions tomorrow, whether that’s purchasing your first dedicated ASIC miner, exploring home Bitcoin mining, experimenting with solo mining, or scaling into a larger mining operation. Every experienced crypto miner started somewhere, and this could be your first step into a much bigger adventure. So have fun, experiment, ask questions, and remember: the goal isn’t necessarily how much Bitcoin you earn today, but what you learn along the way that prepares you for what’s next.
If you found this helpful and your eager to learn more, checkout this article on 4 easy Steps to get Started Bitcoin Mining for beginners!

Happy Mining!
Finally come share your thoughts and questions on getting started crypto mining and crypto wallets in The Hobbyist Miner Community Discord, free to join here